> ## Documentation Index
> Fetch the complete documentation index at: https://docs.pdfnoodle.com/llms.txt
> Use this file to discover all available pages before exploring further.
# Configuring Supabase Storage
Setting up Supabase Storage buckets and access keys can be a bit tricky, so we've broken the process down step-by-step:
### Overview
1. Create a new Storage bucket in Supabase
2. Generate access keys (Access Key ID and Secret Access Key)
3. Fetch your endpoint URL
4. Add the Supabase Storage connection in pdf noodle
5. Set it as your default storage
***
### Step 1: Create a Storage Bucket
1. In your Supabase dashboard, navigate to **Storage**.
2. Click **New bucket** to create a new bucket.
3. Enter a bucket name (e.g., `pdfnoodle-storage`).
4. Choose your privacy settings:
* **Public**: Files are accessible via public URLs
* **Private**: Files require authentication (recommended for PDFs)
5. Click **Create bucket** to finish.
 **Hint:** We recommend making the bucket private. pdf noodle will use signed
URLs to upload files securely.
***
### Step 2: Generate Access Keys
1. In your Supabase dashboard, go to **Settings** > **API**.
2. Scroll down to the **Storage** section.
3. Under **S3 Access Keys**, click **Generate new key**.
4. Copy the **Access Key ID** and **Secret Access Key** — you won't be able to see the secret again.
**Hint:** We recommend making the bucket private. pdf noodle will use signed
URLs to upload files securely.
***
### Step 2: Generate Access Keys
1. In your Supabase dashboard, go to **Settings** > **API**.
2. Scroll down to the **Storage** section.
3. Under **S3 Access Keys**, click **Generate new key**.
4. Copy the **Access Key ID** and **Secret Access Key** — you won't be able to see the secret again.
 **Important:** Store these credentials securely. The secret key will only be
shown once.
***
### Step 3: Fetch Your Endpoint URL
1. In your Supabase dashboard, go to **Settings** > **API**.
2. Scroll to the **Storage** section.
3. Find the **S3 Endpoint URL** (it should look like: `https://[project-ref].supabase.co/storage/v1/s3`).
4. Copy this endpoint URL — you'll need it when configuring pdf noodle.
**Important:** Store these credentials securely. The secret key will only be
shown once.
***
### Step 3: Fetch Your Endpoint URL
1. In your Supabase dashboard, go to **Settings** > **API**.
2. Scroll to the **Storage** section.
3. Find the **S3 Endpoint URL** (it should look like: `https://[project-ref].supabase.co/storage/v1/s3`).
4. Copy this endpoint URL — you'll need it when configuring pdf noodle.
 **Note:** The endpoint URL is specific to your Supabase project and includes
your project reference ID.
***
### Step 4: Connect Your Bucket to pdf noodle
**Note:** The endpoint URL is specific to your Supabase project and includes
your project reference ID.
***
### Step 4: Connect Your Bucket to pdf noodle
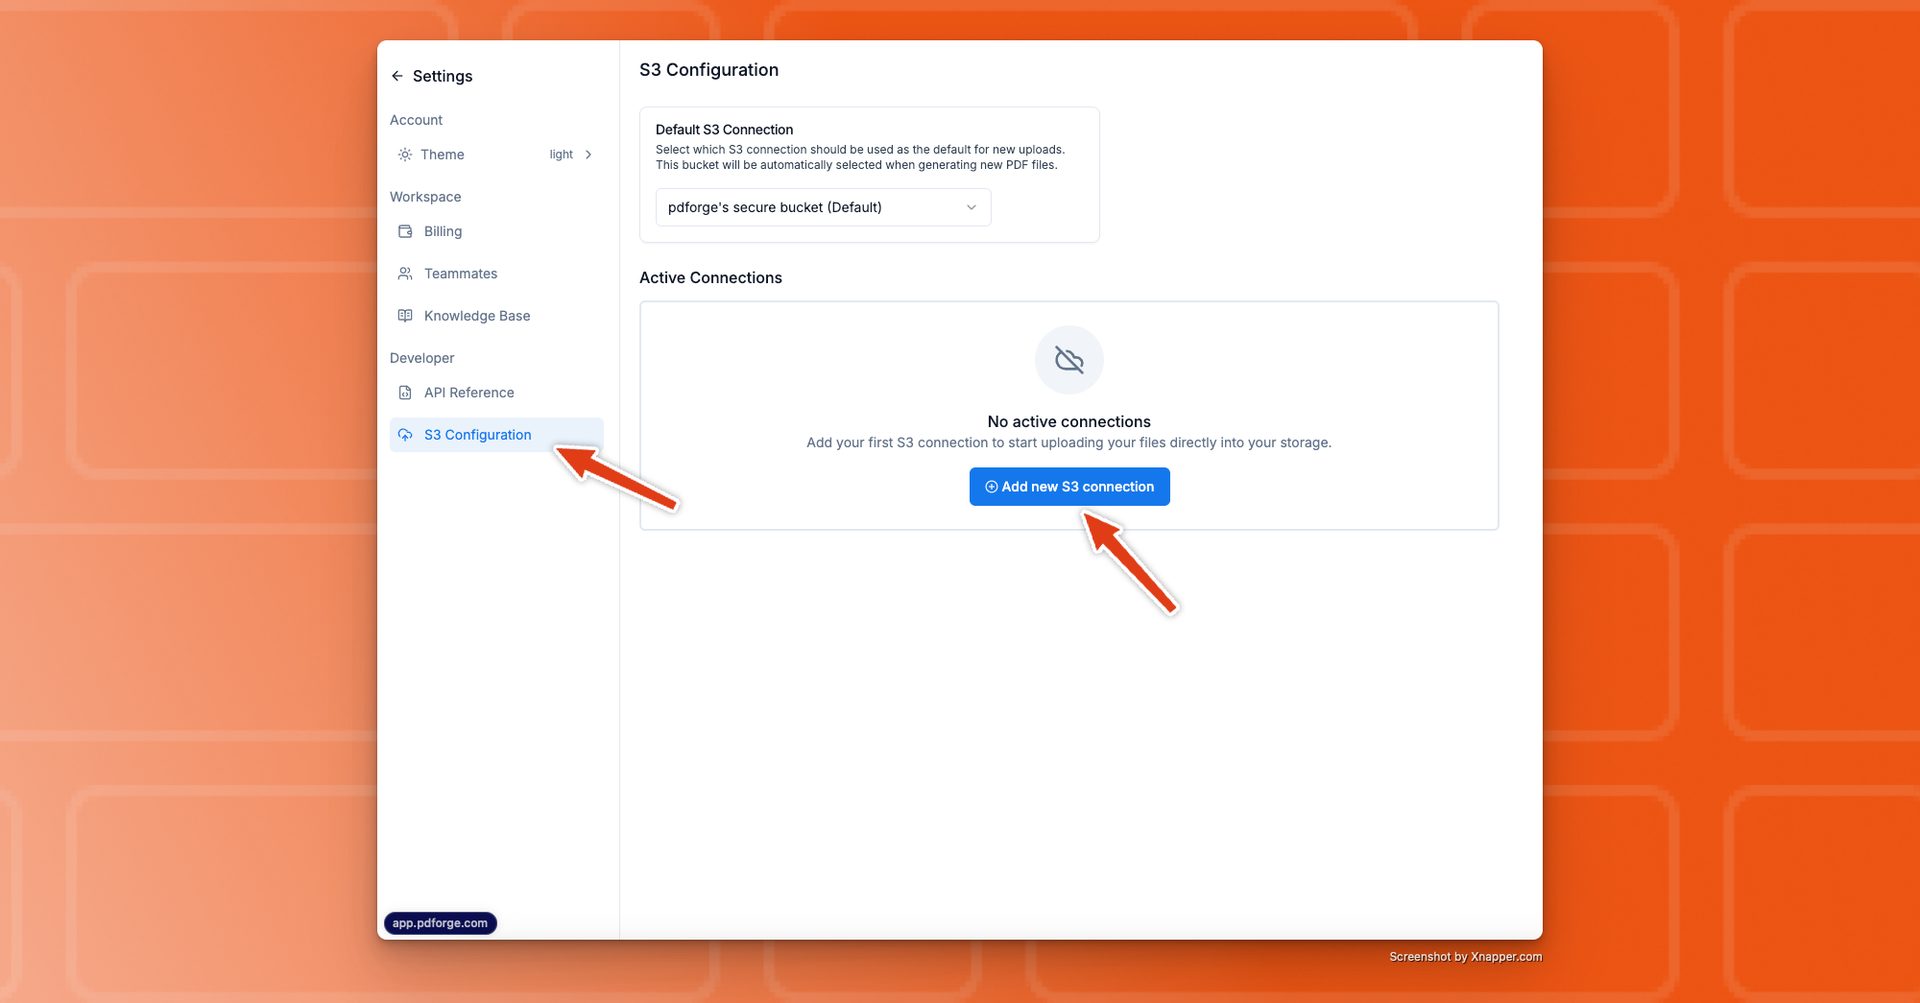 1. In pdf noodle, go to **Settings** > **S3 Configuration**.
2. Click **Add S3 Connection**, then enter:
* **Provider**: Supabase Storage
* **Access Key** and **Secret Key** (from Step 2)
* **Bucket Name** (the bucket you created in Step 1)
* **Endpoint URL** (from Step 3)
* **Region**: Leave as **Auto** (will be automatically detected)
* *(Optional)*: Enable **Upload access only** if you don't want pdf noodle to read from the bucket.
**Note:** With **Upload access only** enabled, we won't return the file in the
API response—only its key.
1. In pdf noodle, go to **Settings** > **S3 Configuration**.
2. Click **Add S3 Connection**, then enter:
* **Provider**: Supabase Storage
* **Access Key** and **Secret Key** (from Step 2)
* **Bucket Name** (the bucket you created in Step 1)
* **Endpoint URL** (from Step 3)
* **Region**: Leave as **Auto** (will be automatically detected)
* *(Optional)*: Enable **Upload access only** if you don't want pdf noodle to read from the bucket.
**Note:** With **Upload access only** enabled, we won't return the file in the
API response—only its key.
 3. Click **Continue**. If everything's configured properly, you'll see a success message.
pdf noodle will attempt to upload a test file to:
`pdfnoodle_test/delete_me_{date}.txt`
Since we don't have delete permissions, you'll need to remove that file manually later.
**Hint:** If you see an error, double-check your credentials, bucket name, and
endpoint URL.
***
### Step 5: Set as Default Storage
3. Click **Continue**. If everything's configured properly, you'll see a success message.
pdf noodle will attempt to upload a test file to:
`pdfnoodle_test/delete_me_{date}.txt`
Since we don't have delete permissions, you'll need to remove that file manually later.
**Hint:** If you see an error, double-check your credentials, bucket name, and
endpoint URL.
***
### Step 5: Set as Default Storage
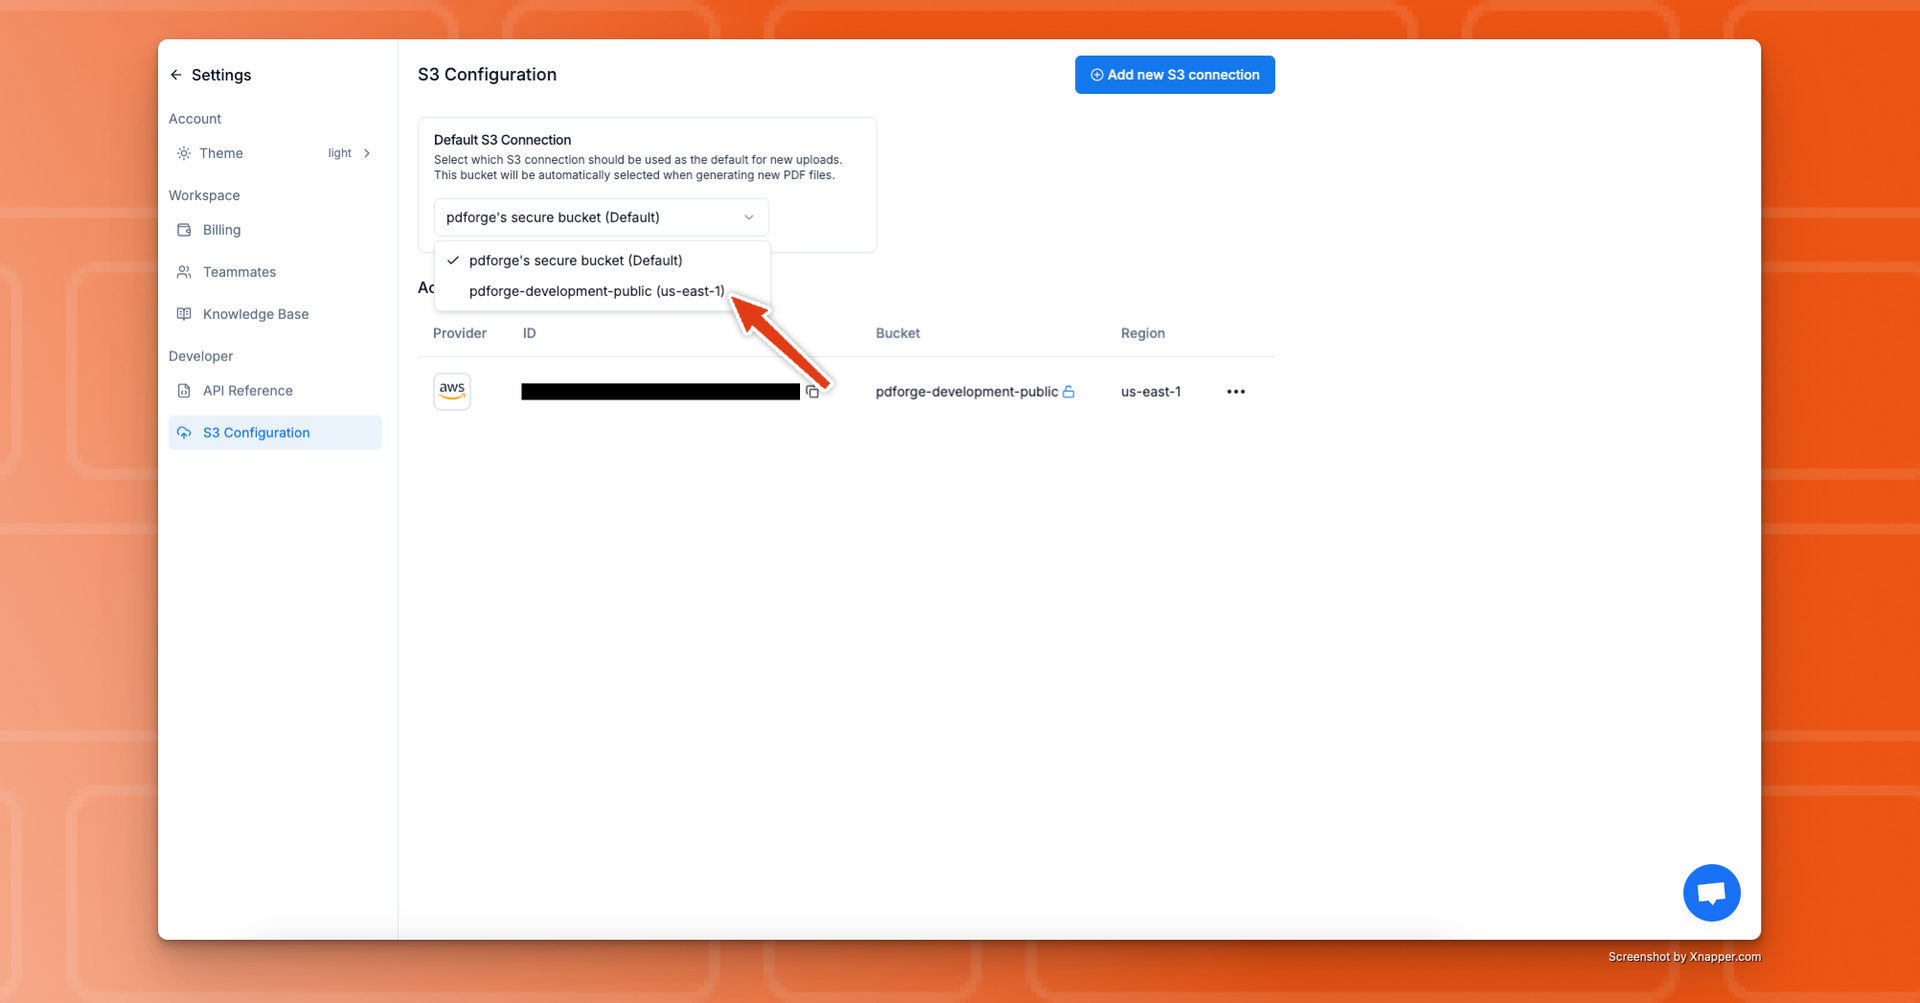 Go back to your S3 settings in pdf noodle and select your new connection as the default bucket. **All future PDFs will now be saved there. 🎉**
**Hint:** You can also set on which `s3_bucket` and `s3_key` you want to save
PDFs individually, by passing an extra parameter. [You can see more about it
here](https://app.gitbook.com/o/6WKbIlYX72bYYe0wYnOa/s/5XMpOekw27OhJlJjfwYv/)!
Go back to your S3 settings in pdf noodle and select your new connection as the default bucket. **All future PDFs will now be saved there. 🎉**
**Hint:** You can also set on which `s3_bucket` and `s3_key` you want to save
PDFs individually, by passing an extra parameter. [You can see more about it
here](https://app.gitbook.com/o/6WKbIlYX72bYYe0wYnOa/s/5XMpOekw27OhJlJjfwYv/)!